Wherein I document how to make the bases for my army.
A quick backstory: I originally picked Sector Imperialis bases from GW because they looked great and I was just getting back in to the hobby. For 2021 part of my goal is to bring my existing force up to a "final" (har har) methodology of painting that uses some edge highlighting and oil washing. The models I've completed look really good on their temporary bases. They don't look good on some of the SI bases. I tried a bunch of variations to see what I could come up with, using blu-tac to attach one of the new-final models to various bases with various color tones and combinations. Nothing was as good as the simple dirt base in the set with a dark undercoat and drybrushed texture.
 |
The eventual winning prototype from the Sector Imperialis set
|
While this was a fun set of experiments to see what kind of metallics I could create, nothing clicked. Adam Fasoldt helped me understand why: the I chose for the pauldrons is a cold color, and I want a very netural grey, so the bases should be warm. An important part of the SI bases is that they have a pavement-esque texture in them, and no matter how hard I try that's never going to feel both like pavement and warm.
So, back to the drawing board entirely. I spent a few hours looking at other various pre-textured solutions from the usual suspects (Secret Weapon, Fallout Hobbies) but nothing matched the simpler style I wanted in my head. The other problem with pre-textured solutions is that oddly sized bases aren't well supported. There is no Redemptor Dreadnought sized base in any of GW's pre-textured lines, and now that Outriders are on yet another size base, it was increasingly appealing to make my own.
More trial and error ensues. Using multiple sizes of stones and sand (which train hobby guys will call ballast or aggregate) makes the base look more realistic, so I picked up a couple varieties from Michael's and some molding paste and made a test base. I was hoping to create a relatively barren landscape littered with skulls and debris. My test base didn't use multiple sizes, just the bigger chips, as I wasn't sure how it would look next to a model. I put the stones down at the same time as the modelling paste, and no base is complete without a skull.
The sculpting tool proved to be total overkill for a 32mm base, though I suspect it'll get used for Outrider and larger bases. Tamiya Paint Stirrers have a great flat end and are stainless steel so they clean up quickly, and ended up being my tool of choice to do the surface. This compound shrank more than I expected despite lathering it on, so several of the rocks came loose when I airbrushed a black undercoat on.
Then on to paints. I needed to create a warm, earthy tone that might feel like churned mud or clay that had been fought over for months, and something that would complement the walls I'd painted the week prior. Zandri Dust was the heaviest lifter on the walls, so the soil color needed to be darker or the bases and walls would run together.

The deepest warm brown that GW makes is Rhinox Hide, and it's a favorite for sponge weathering because it feels a lot like it's mud. (I'd originally tried to use Rhinox Hide on the Sector Imperialis bases when I got back in to the hobby with Dark Imperium, but couldn't make it work without more texture to drybrush up). The next layer I tried to drybrush on was Gothor Brown, but it immediately turned the base too cold, and because that's the color I use for edge highlighting leather there was risk of the colors blurring together. Doombull Brown has a nice warm reddish tone that worked much better, and layering up Baneblade Brown then Karak Stone on top of it resulted in a transition up to a limestone-like color that I frequently see when walking on trails in California. The final result is a huge improvement over the "proposed" basing.
 |
| Yup
|
 |
| Nope |


Even though the end result of these wasn't bad and it confirmed that the colors I was using were going to work great, it wasn't what I had been trying to achieve. The addition of this much sand to the whole surface resulted in a very "noisy" result that did not match the vision in my head. It had also taken longer, as this required a layer of thinned PVA glue over the molding compound to place the sand, and another to lock it in. The efficiency loss combined with the less interesting bases was not a good route for me. I scraped this whole set of bases with a drywall tool and tried again.
For this round I accepted that I'll need to use a less readily-available mixing compound, and dug out the Huge Miniatures basing textures of Basalt and Mud. I had purchsed these after Adepticon 2020 was cancelled to support the vendors who had built up stock in anticipation of the show that never happened. Going in to this step, I didn't know which texture I'd end up liking more, so I mixed them up to create variety. The transition between dirt and mud is always unclear anyway, so it won't look wrong for them to coexist. The Mud texture constricted quite a bit more than the Basalt did, so I needed to apply some extra Mud the next morning around the larger pieces on the base to make them feel more natural. It was really nice to be able to just glop more on without worrying about any blending because it's mud and natural mud is always messy anyway! I also added a couple small pieces of cork under the textures in an experiment to add height variety.
 |
| Forbidden Peanut Butter Fudge Cookies |
When wet there's a stark difference in color, but when dry they blend nicely. The colors that these settle in to are quite pleasant and in some schemes I'm sure you could just use them out of the pot. For me the small stones and skulls need painting and it's not quite as warm or rich as I'd like it to be. I lost fewer chip stones in the airbrushing stage this time despite not applying thinned PVA before priming - these mixes have great adhesive quality.
 |
| Stylinrez Black |
 |
| Rhinox Hide |
 |
| Doombull Brown |
 |
| Baneblade Brown (the wrong pot is in the photo!) |
At this step the bases look really good, but are all very uniform. I used a couple of washes to try to change the tone of the soil, finding Nuln Oil and Carroburg Crimson to be effective at darkening and waming the tone of the soil.
 |
| Spot washes left to right: Carroburg Crimson, Druchii Violet, Nuln Oil |
I also painted the rocks slightly different colors, or used washes over top of Baneblade Brown. Larger stones like you see in nature are "uniform" in color compared to the erratic colors of soil or gravel, so they need to be basecoated to feel natural. I was pleasantly surprised by how much one wash made the rocks feel like they were accent pieces, and I think I'll be able to mix and match contrast and washes to make a huge variety of rocks that feel "right" with the soil color and texture.

To unify the rocks with the bases, one last drybrush of Karak Stone went over the entire base, representing the "dust" layer. Last but not least: skulls, using my reliable recipe of Rakarth Flesh -> Skeleton Horde -> Screaming Skull highlight.
To say that I am happy with how these came out would be a tremendous understatement. They feel war-torn and desolate, with enough interest to make them all unique, and they didn't take all that much work.
The most surprising result is that the base materials are very difficult to tell apart once painted unless you're very close up. Basalt kept its jagged shape a bit better and picks up drybrush detail more clearly, but the mud does a better job of absorbing the chip stones in a natural way and can be swirled to create interesting patterns. I have since ordered two more textures from Huge Miniatures (Stone and Earth) so expect future comparisons once I get a chance to make more bases. I suspect there won't be much in the way of visible difference, but that's ok! Being able to mix in new and different textures but keeping the bases feeling cohesive will just be part of the fun.
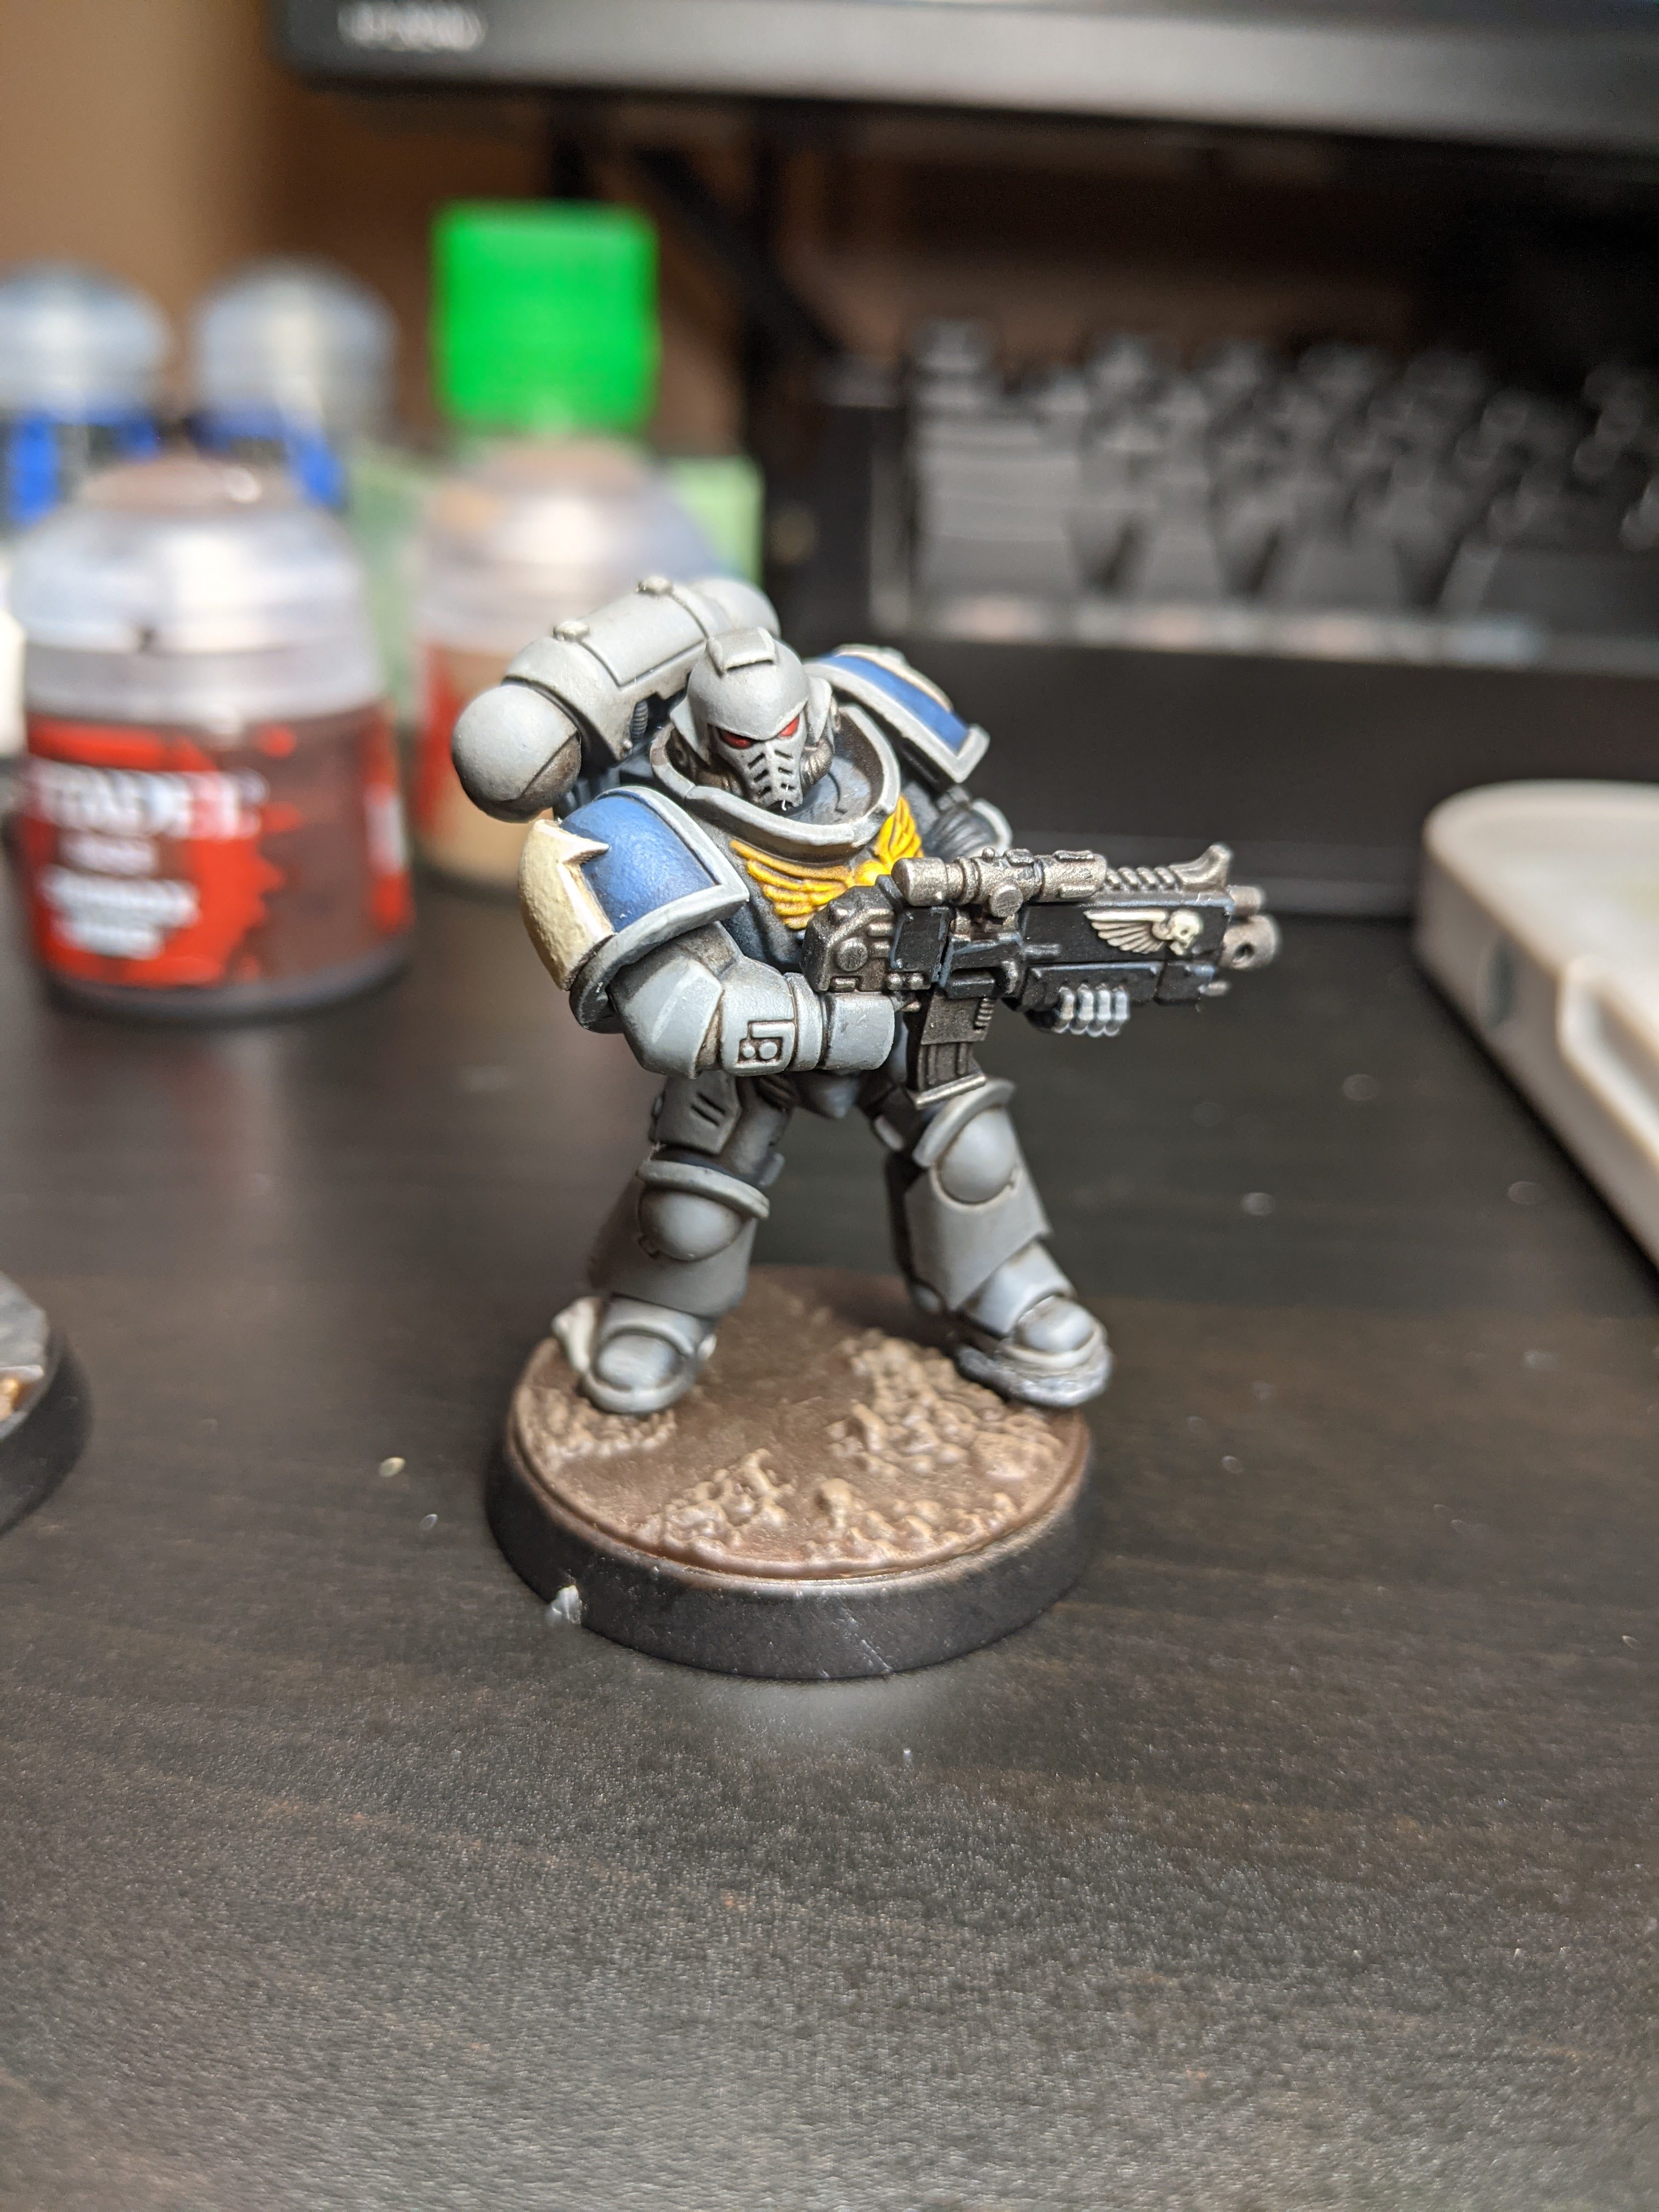
And of course, the almost-final product (missing transfers on knees and a victory lap of black around the base rim). Pinning is an absolute must on this texture, and drilling was no problem. Finding the right place for the feet is the only real challenge.
 |
| This poor Aggressor broke at the knee for the fourth time when putting him on the base. |
I hope you enjoyed this journey, and it inspires you to find your own path. The supplies necessary for this are minimal if you use a pre-mixed texture, and the control over how the bases complement your army is bar none. Special thank you to Rich Berrill and Colin Ward for their advice and patience, and Loopy for helping me over the warm/cold hump.


